

In eSkooly Pro (Standard and Premium packages), you have the option to purchase additional add-ons to extend the functionality of your system. If you are subscribed to the Business package, these modules are already included, so no additional purchases are required. For more information and to purchase these add-ons, visit https://pro.eskooly.com/modules.
Once you purchase an add-on, you will instantly receive a module_name.zip file along with activation details via email. Download the .zip file to proceed with the installation.
In this guide, we will demonstrate how to install the Zoom module. The process is the same for installing and activating all modules.
Steps to Install a Module in eSkooly Pro:
- Log in to your eSkooly Pro Super Admin dashboard.
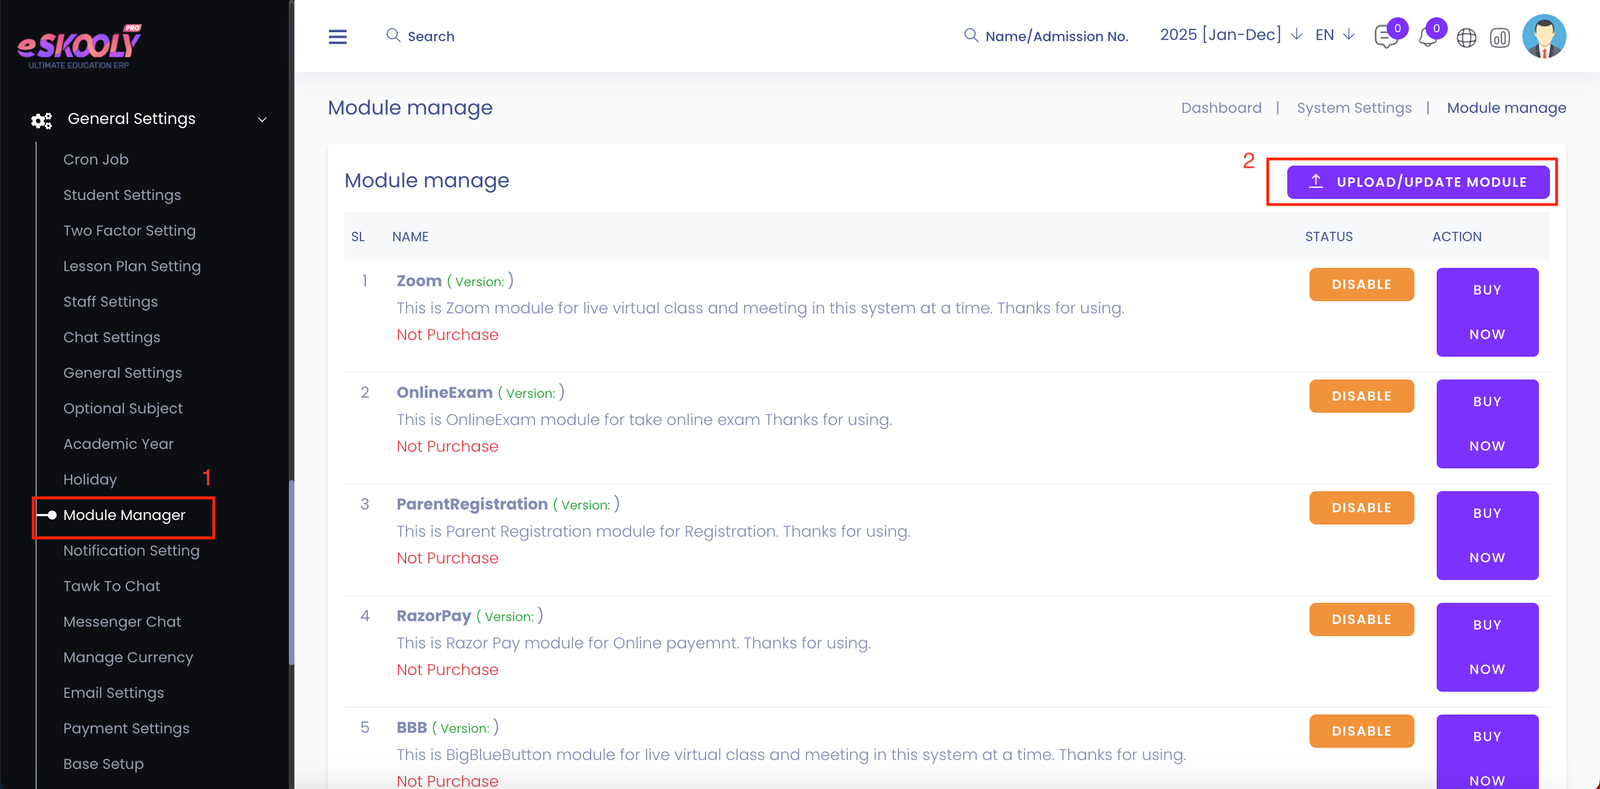
- From the left menu, navigate to General Settings > Module Manager.
- On the Module Manager page, locate the Upload/Update Module button at the top-right corner and click on it.

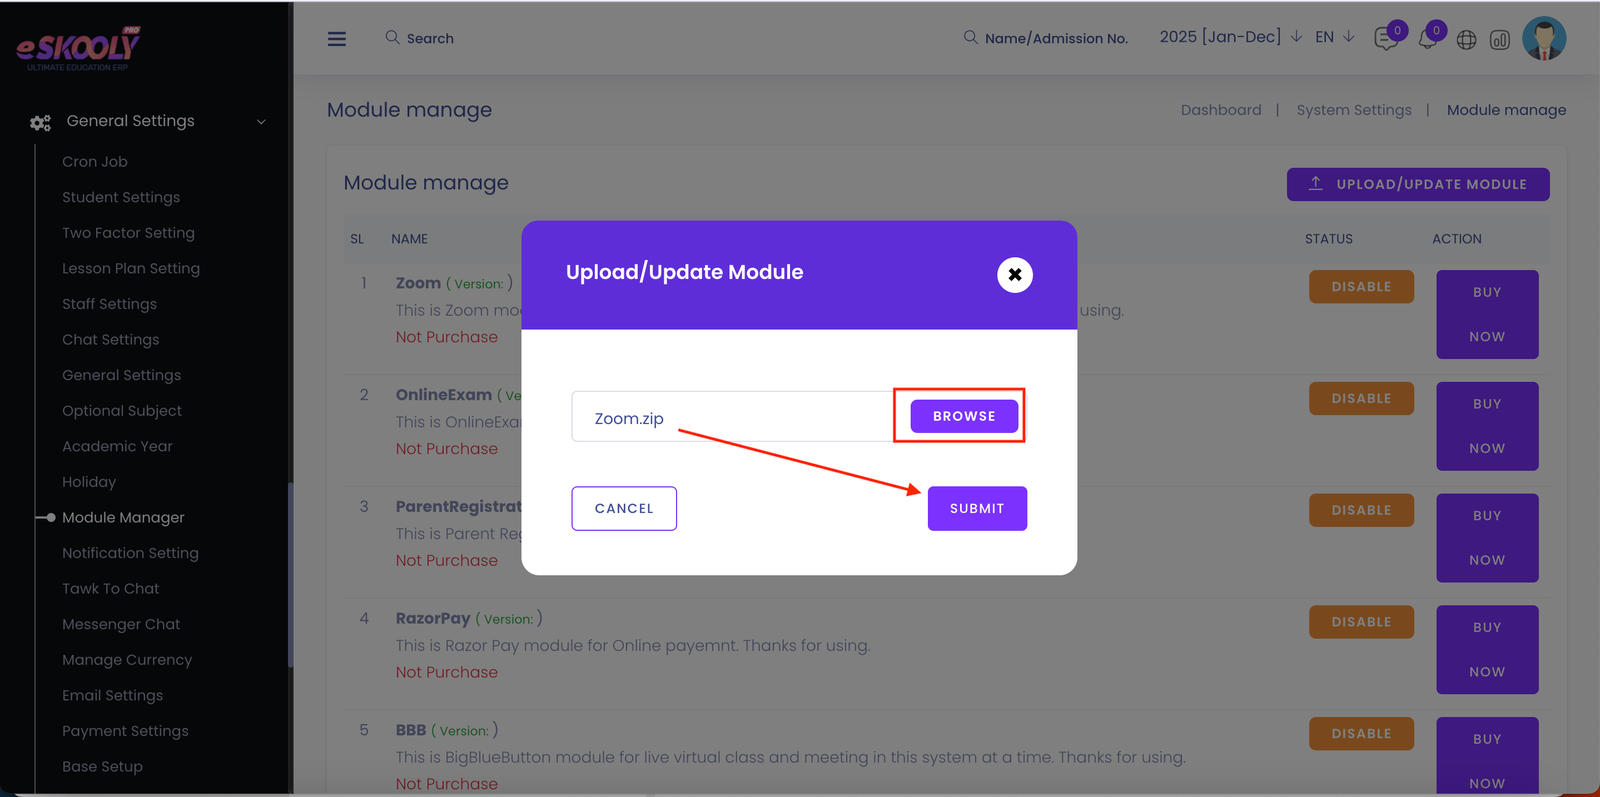
- A popup will appear, asking you to upload the module file. Click Browse, select the module_name.zip file you downloaded after purchase (e.g., Zoom.zip), and click Submit.
- After the upload is complete, you will see a Verify button next to the module (e.g., Zoom module). Click on it.
- A popup will open where you need to enter the activation details you received via email. Enter the details and click Verify.
- Once verified, an option to Enable the module will appear. Click the toggle button to enable the module.
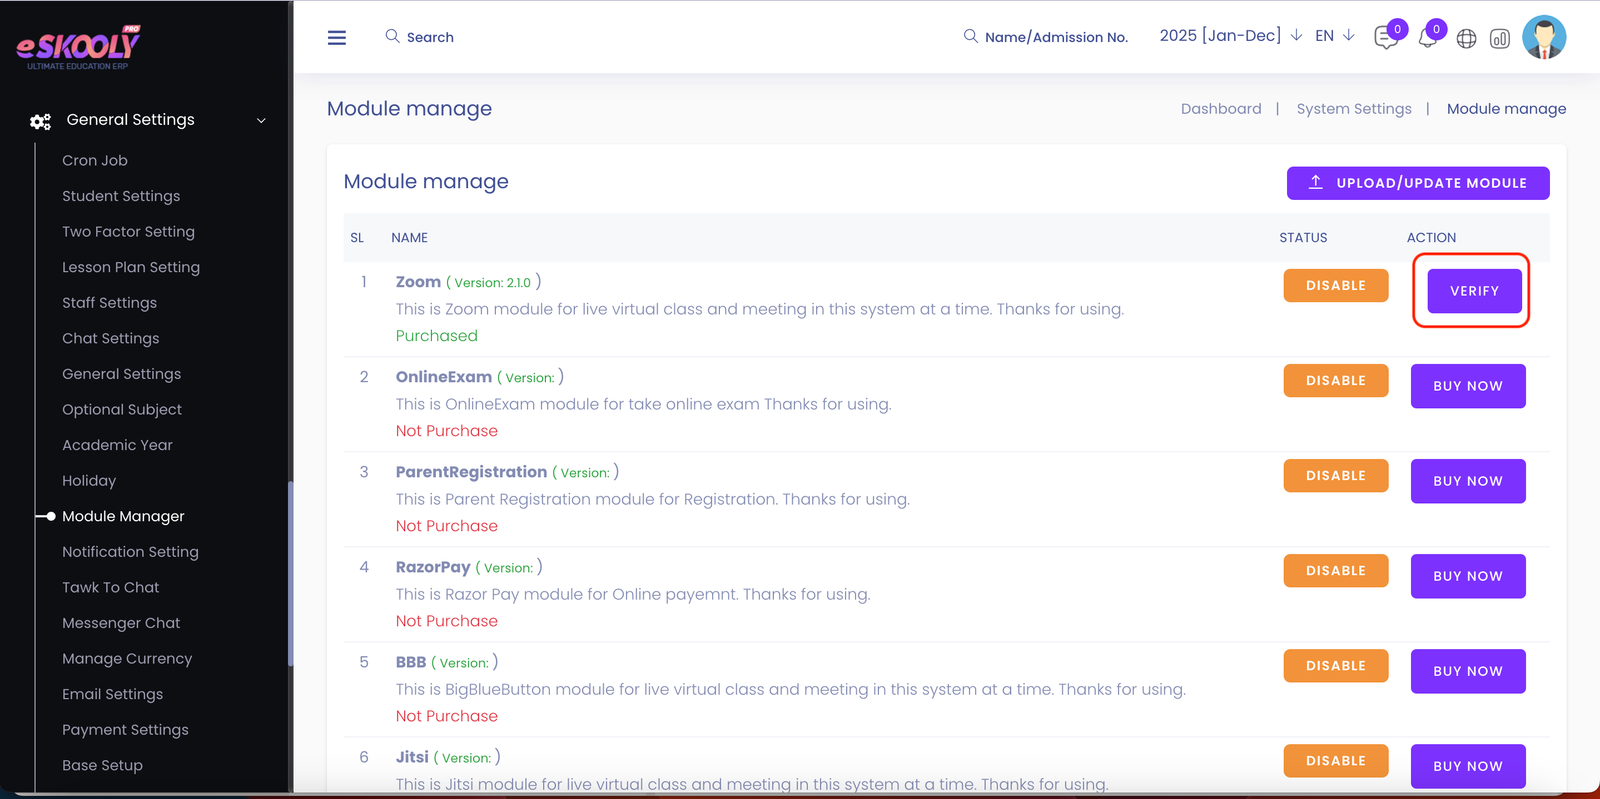


Congratulations! The module is now successfully installed and activated. You will see a new section in the left menu named Modules, where all installed modules will be listed.

Note: If you encounter any issues during the installation process or need further assistance, feel free to explore our Knowledge Base or contact our support team.


