

Once you’ve purchased the eSkooly Desktop version, you’re only a few simple steps away from bringing our robust educational management system to life on your computer. Here’s your ultimate guide on downloading, extracting, and installing eSkooly Desktop for both Windows and Mac. It’s as easy as it gets – and if you’re ready to dive in, let’s go! 🚀
Step 1: Downloading eSkooly DesktopAfter your purchase is complete, check your email inbox. You’ll receive two important emails:
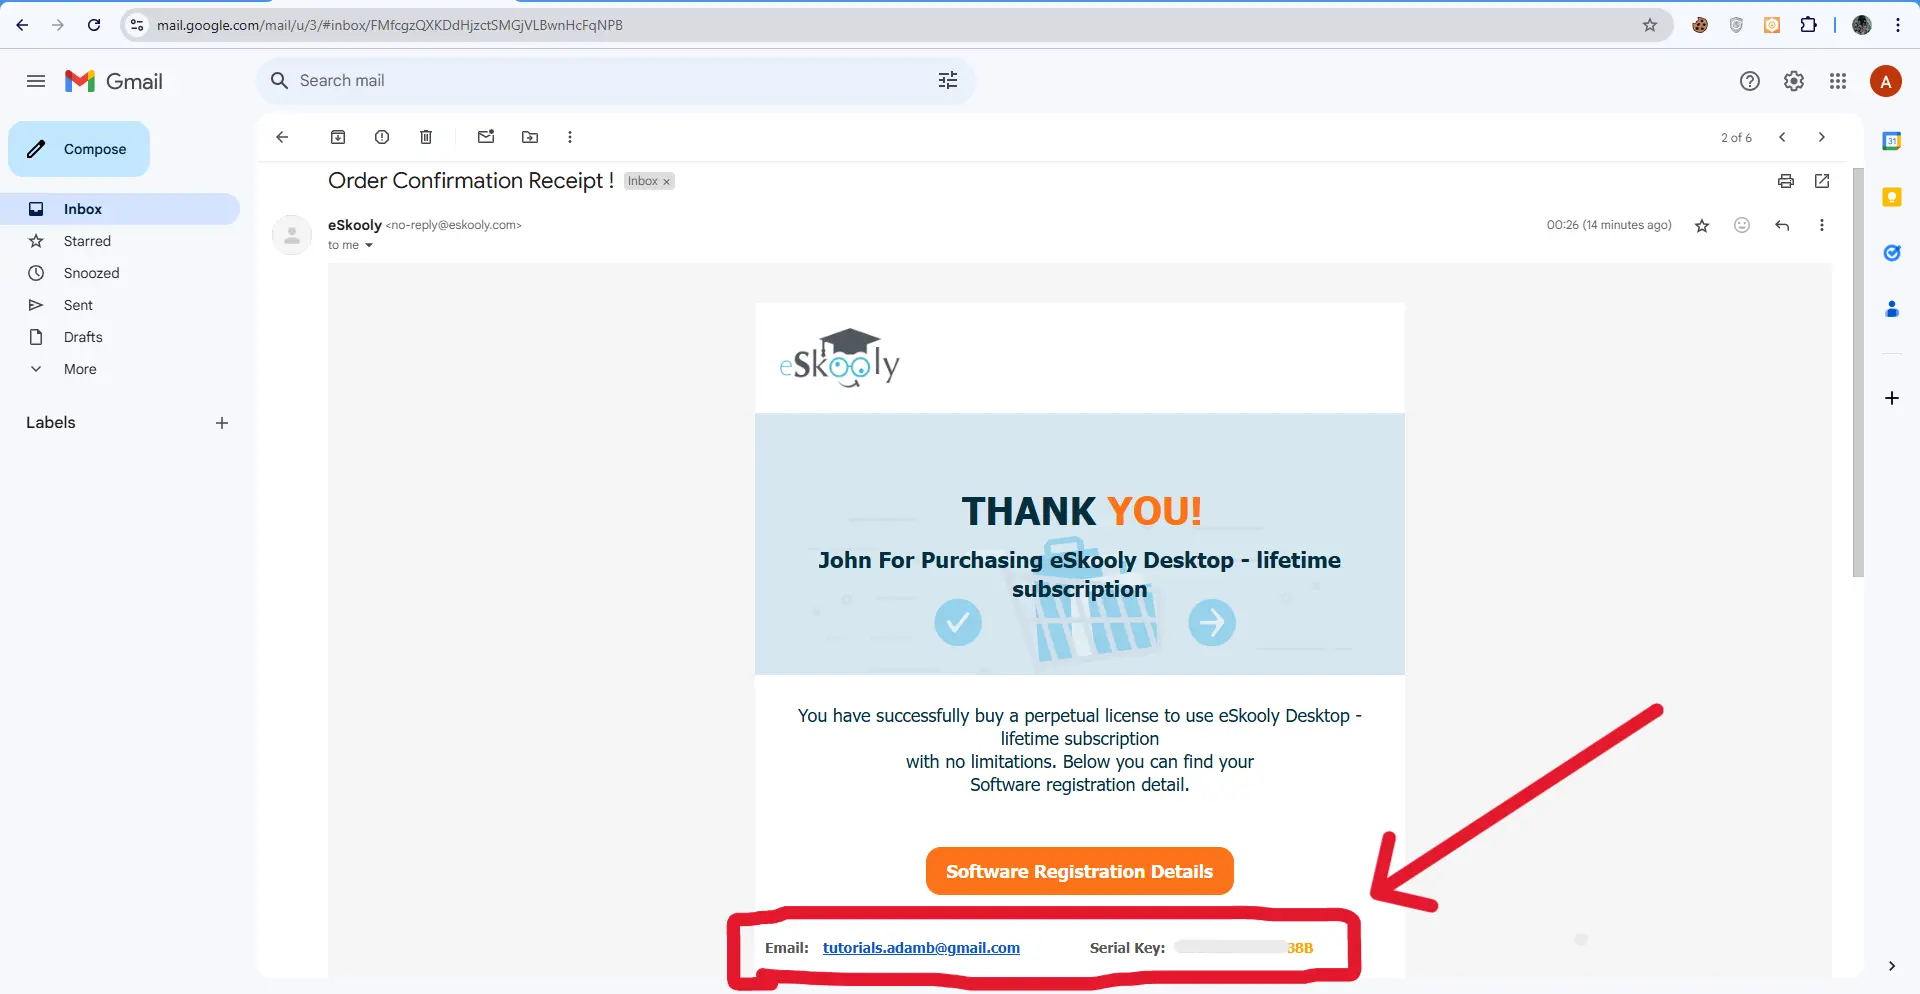
- An email from eSkooly containing your activation keys 🗝️
- An email from 2Checkout containing the download link to eSkooly Desktop.
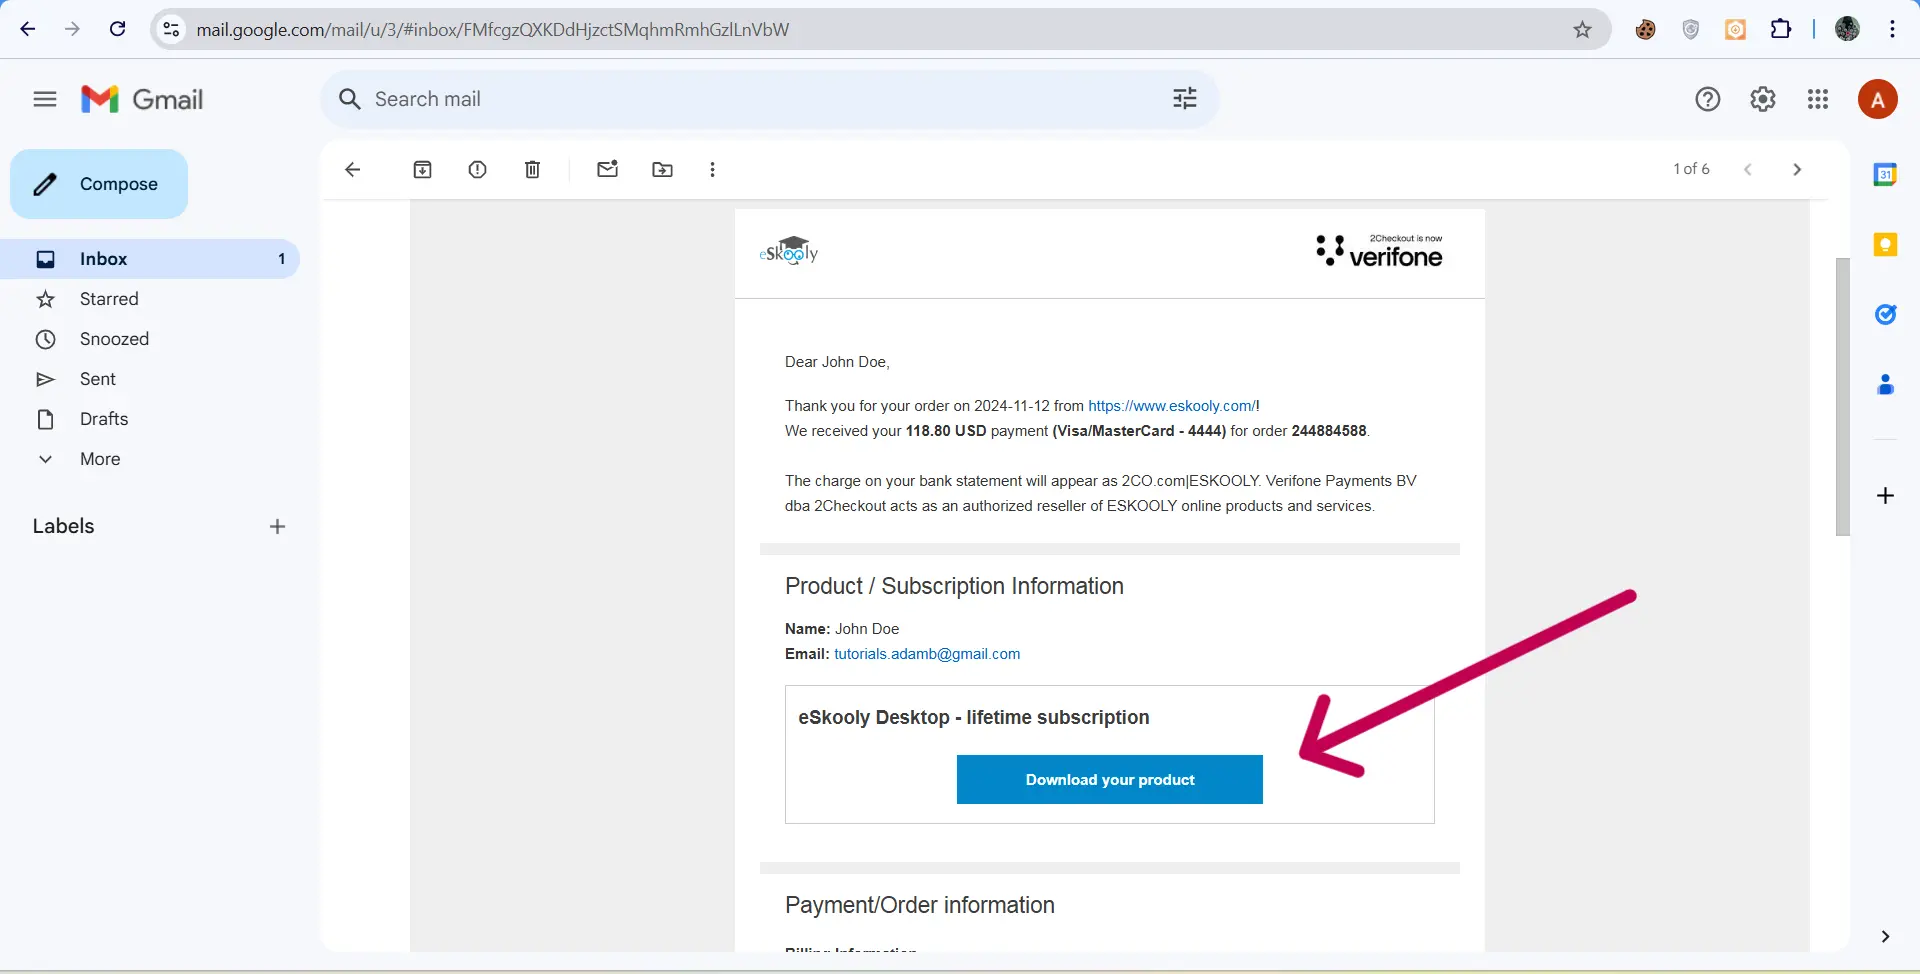
Simply click the download link in the 2Checkout email, and the eSkoolyDesktop.zip file will begin downloading.
Step 2: Extracting the Zip File
Now that you’ve got the eSkoolyDesktop.zip file downloaded, it’s time to unzip it. Here’s how:
On Windows:- Right-click the eSkoolyDesktop.zip file.
- Select Extract All… and choose your preferred location.
- Click Extract, and the files will be unzipped in just a few seconds.
- Double-click the eSkoolyDesktop.zip file.
- The files will extract automatically into a new folder, which will appear in the same location as the zip file.
Now, you should see a folder with three subfolders: Windows, macOS, and Linux. Find the folder for your operating system, and let’s move to the final step!
Step 3: Installing eSkooly Desktop on Windows
- Open the Windows folder.
- Double-click on the .exe file (the installer).
- The installation process will start. Just follow the prompts and be patient – the setup will only take a few moments.
Once done, you’re ready to launch eSkooly Desktop on your Windows device! For a step-by-step visual guide, check out our video tutorial below.
Step 4: Installing eSkooly Desktop on Mac
- Open the macOS folder.
- Double-click on the .dmg file.
- You’ll see a screen with the eSkooly icon and an Applications folder.
- Drag the eSkooly app into the Applications folder – and voilà, it’s installed! 🎉
If you prefer a video guide, check it out below.
Fixing the 'Cannot Be Opened Because the Developer Cannot be Verified' Error on Mac 🛠️
MacOS security can be a bit, well… overprotective. If you see this message pop up, it’s no biggie. Here’s how to fix it:
- Open System Settings.
- Go to Privacy & Security.
- Scroll down to find eSkooly under “Blocked Apps.”
- Click Open Anyway – and you’re all set! 🎉
For a quick video on fixing this Mac security prompt, check it out below.
You’re Ready to Go! 🎈
That’s it! You’re now all set to explore everything eSkooly Desktop has to offer. Just launch the application, login as admin, and enter the activation key provided in your email.
Enjoy managing your institution with the ultimate power and ease of eSkooly Desktop! 😎


